RetroComputing: A Tale of Shuttle Motherboards and Pentium II
Some 4-5 years ago an acquaintance of mine gave me one desktop computer tower asking if “it could be used to do normal computer stuff, like watching YouTube and such?”. After booting the machine (without even looking for any hardware details), I see myself facing a mere memory, a Windows NT 4.0 Server Edition booting sequence and login screen. I quickly answer that this machine is a piece worthy of a museum and he quickly said: “so it is trash, do whatever you want with it”. I tossed the machine away in my basement until today.
In the past few years, I gained much interest in old machines. Inspired by YouTube channels such as The 8-Bit Guy and Adrian’s Digital Basement, and by projects such as Build an 8-bit CPU from scratch from Ben Eater, I started recovering some of the old hardware pieces stored in my basement.
The Machine
The computer case was all yellowed. After opening the case, I could see the years of accumulated dust and some rust in the case and some connectors. So, the first thing was to dismantle the whole thing. The inventory of components by the end was:
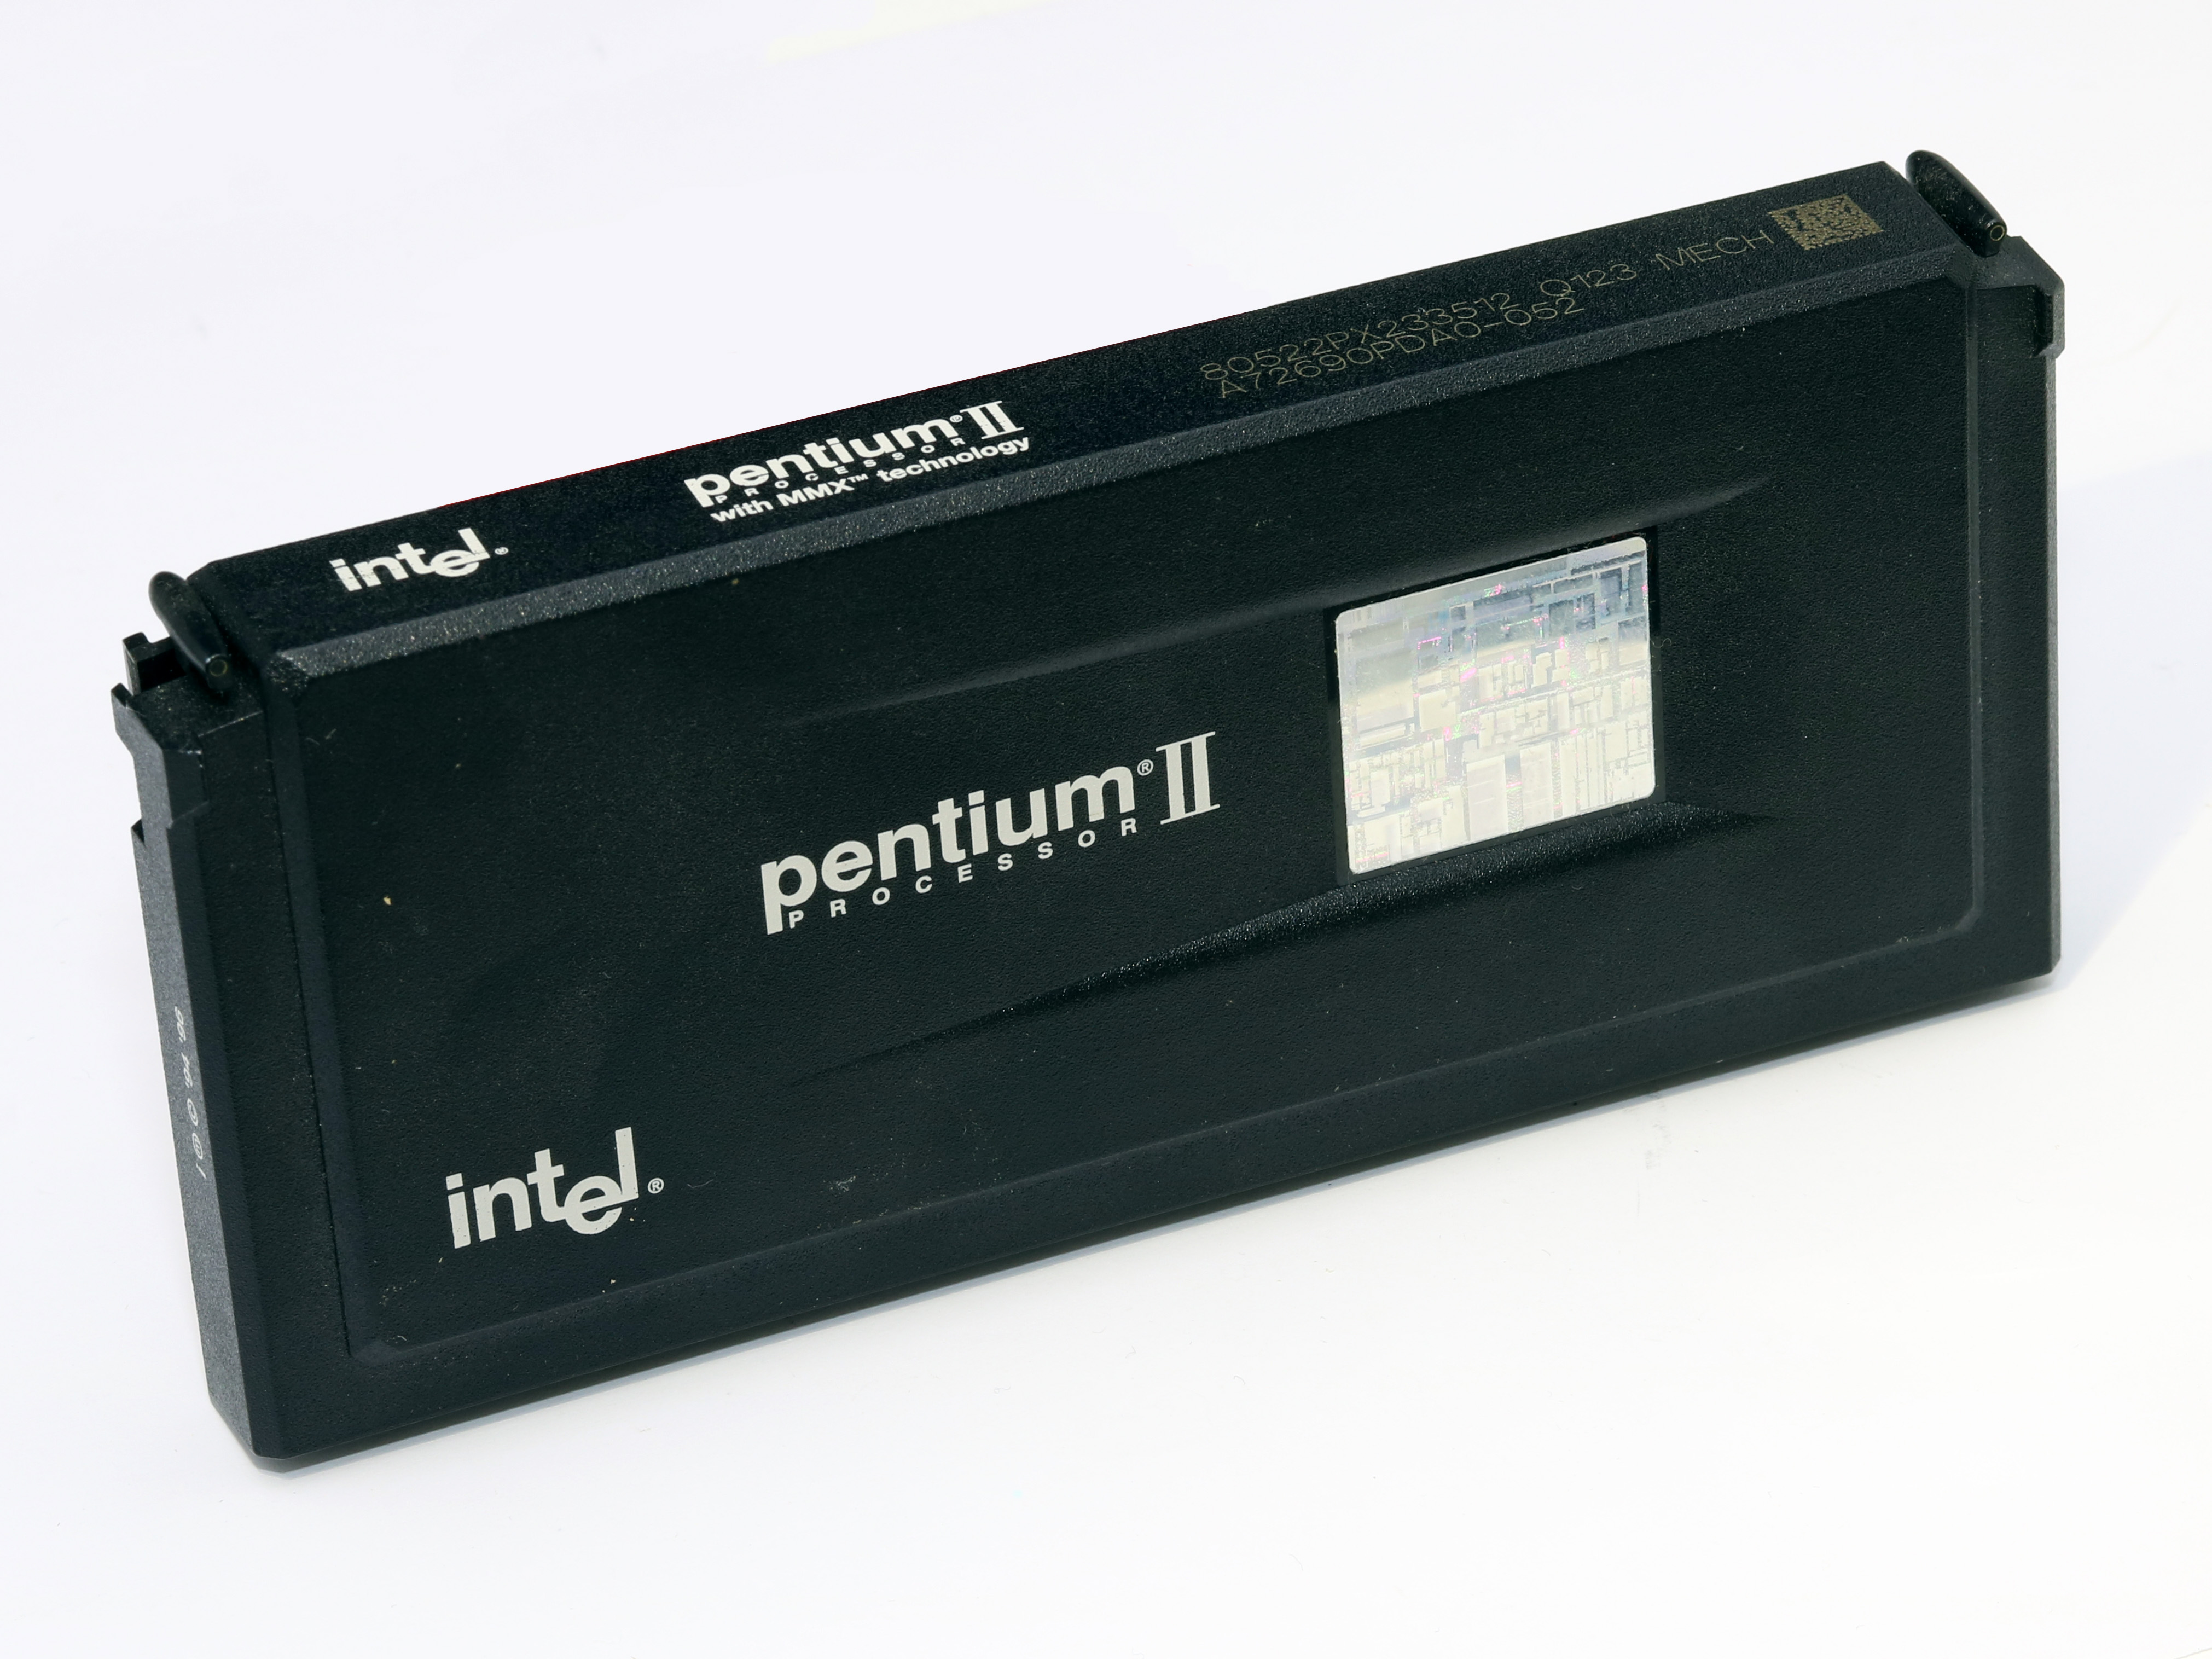
- Intel Pentium II-MMX SL2QA, 233MHz CPU frequency and 66MHz bus speed (1997)
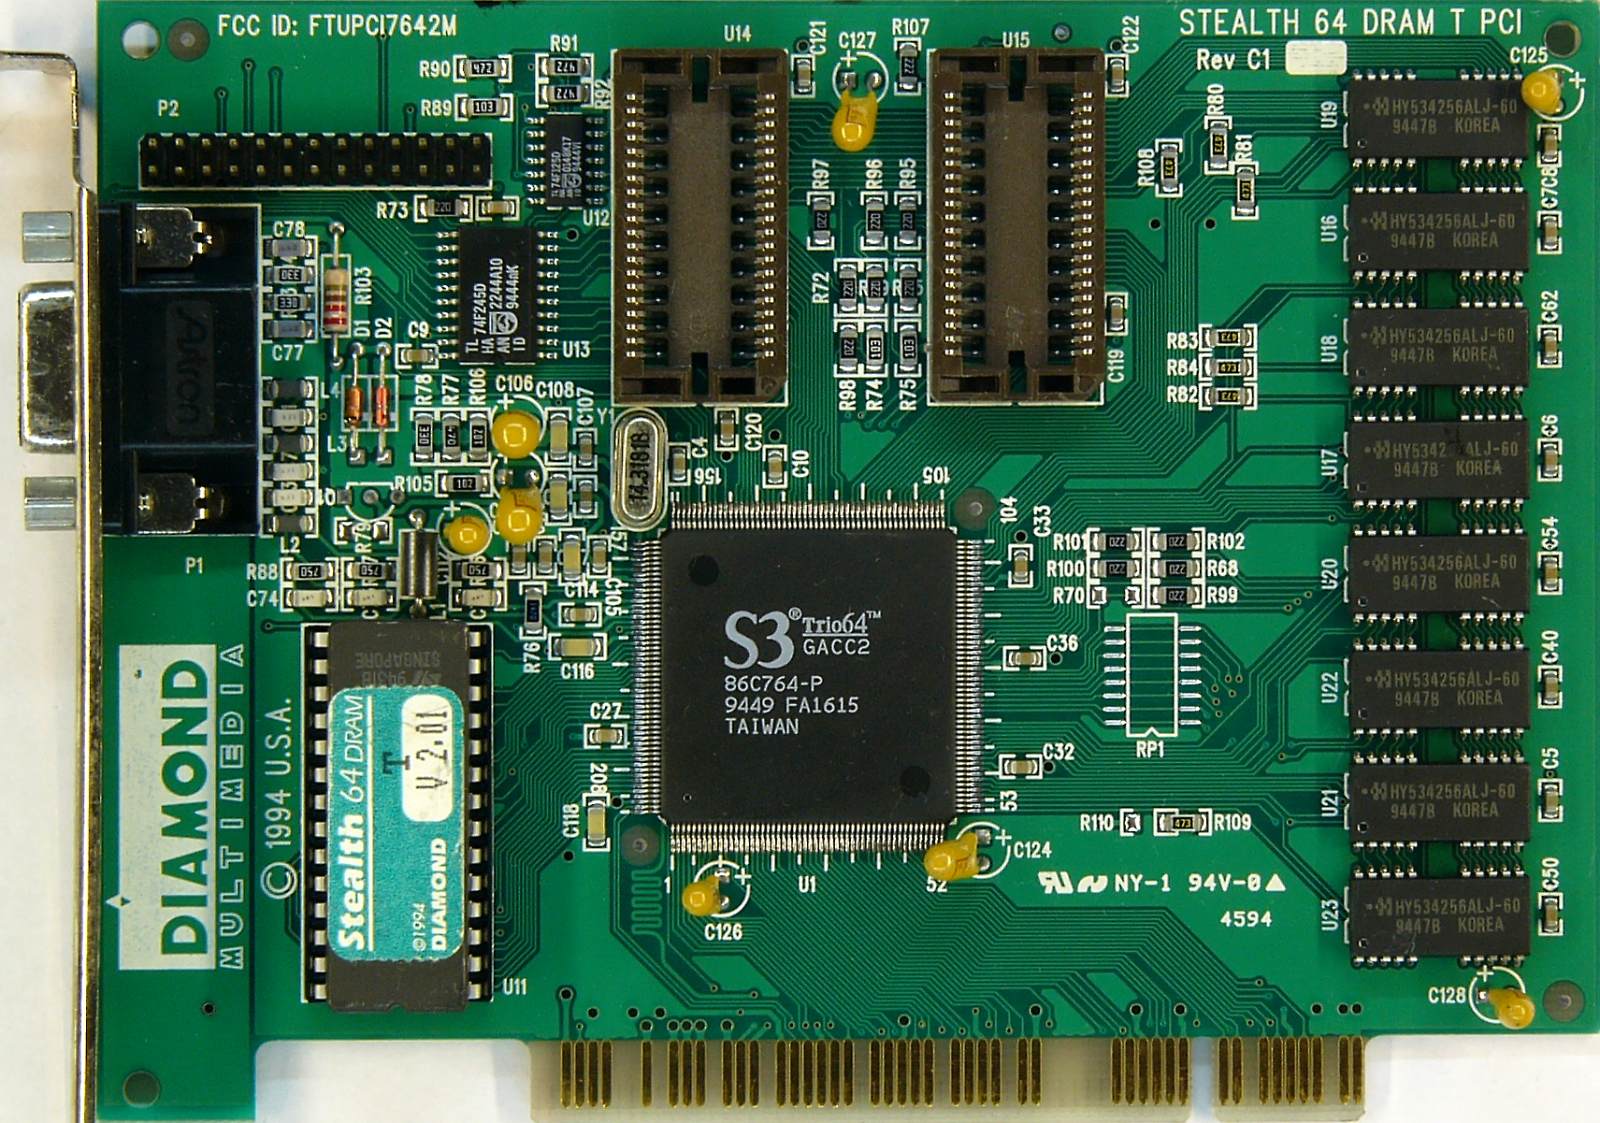
- Diamond Stealth 64 DRAM T PCI rev.C1 VGA Card (1994)
- HOT-635 Mainboard by Shuttle Computer International, Inc., AWARD Bios, Slot 1, Manual - PDF (1997)
- Ethernet SPI board
- 2x 128Mb DIMM RAM
- 1x 64Mb DIMM RAM
- 1x 32Mb DIMM RAM
- 2x Generic 120mm Fan
- 1x IBM DDRS-34560 3.5-Inch HDD, 4560 MB, SCSI connection.
- 1x 3½-inch Floppy disk drive (FDD)
- 1x CD drive
- 1x Power Supply
Some red connection jumpers fell from the mainboard while dismantling the thing. And while most of the components were easy to identify (since they have manufacturers and model stamps), the motherboard was not so easy to identify. However, several hints were available: (1) the Foxconn logo in the PCI slots, (2) the Intel’s 440LX AGPset chipset, (3) Adaptec AIC-7880 SCSI controller. None of which yield results.
Find the Board Adventure
I did a set of ~low-quality~ pics of the board and shared them in /r/retrocomputing. After many comments and discussion the u/CheapScotch replied the following:
Back in the day we used to have a program from Micro House that let you search a huge database of motherboards by specifying CPU type, expansion slots, ram slots, etc. Someone did a dump of the data but didn’t replicate all the search parameters we used to have. Still, you can probably look through the pictures and find your board.
EDIT: This looks like it could be the one? link
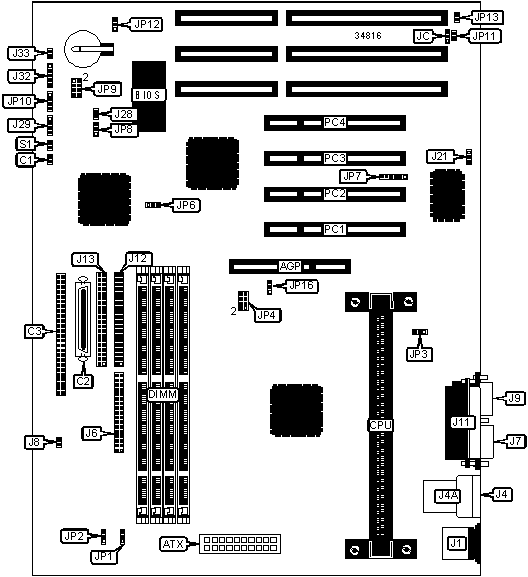
The board was indeed the one that the user suggested. The website Total Hardware 1999 has much information regarding old components, with a particular focus on the jumper settings for these hardware pieces.
Shuttle Europe also has an Archive Server with all the manuals for their ancient products here.
After washing the computer case, cleaning all the components with contact cleaner, removing the dust with some pencils and removed the rust marks with some WD-40, the computer was ready to be reassembled together.
| CPU speed | Clock speed | Multiplier | JP4 | JP9 |
|---|---|---|---|---|
| 233MHz | 66MHz | 3.5x | Open | 1 & 2, 5 & 6 |
| 266MHz | 66MHz | 4x | Open | 3 & 4, 5 & 6, 7 & 8 |
| 300MHz | 66MHz | 4.5x | Open | 3 & 4, 5 & 6 |
| 333MHz | 66MHz | 5x | Open | 5 & 6, 7 & 8 |
First, the jumpers on the motherboard must correspond to the CPU specifications. Since this Pentium version works at 233MHz and 66MHz clock, the JP4 should be all open and JP9 should close pins 1 & 2 and 5 & 6.
After connection the power supply, the S3 VGA card and one stick of RAM, it was time to check if the machine booted to BIOS. However, nothing happened. Connecting the HDD by SCSI did not provide different output. Connecting the floppy drive and switching the RAM used made the machine start at last.
A beep code played (1 long, 3 shorts). Reading the AWARD Bios beep codes, it meant Video card not detected (reseat video card) or bad video card. Switching SPI slots made the computer boot to BIOS, and the automatic memory check was completed successfully (total of 294912K of RAM).
Connecting the remained components by trial and error, it was identified that the 64MB RAM stick is dead and the CD drive does not open. Aside from that, all components seem to be working OK.
From Beep to Windows 98
After replacing the broken CD drive by a spare one (with DVD support), I was able to boot to the Windows 98 installer (be careful to use a bootable version of the installer, because some need additional boot disks, and DOS will not see a CD-ROM drive unless a driver is loaded).
Hint: You can download the Windows 98 ISO images from a lot of different archive websites (DuckDuckGo them).
Due to the default low resolution of the Diamond Stealth VGA card, I cloud not use any of the displays at my disposable to format the machine (I cloud go as far as to create the HDD partitions, but after that I cloudn’t pass a black screen with the Not Supported text).
The temporary solution was to use a newer AGP graphics cards, in the case a NVIDIA GeForce2 MX 400. With this I was able to format the machine and boot to Windows 98.

TODO List
Several challenges remain. Next steps:
Replace the malfunctioning CD drive.Format the machine with Windows 98 or 95.2.1. There is no support for USB by default. I will try to use a generic Windows 98 USB Storage Driver. 2.2. I want to have Internet connection, but I will need to find the proper drivers to one of the Modems/Ethernet PCI express boards that I have laying around.Remove all the yellow from the computer case (peroxide magic formula).- Play some games.